NOTE: THIS BLOG DOES NOT EXIST

Well, that's not precisely accurate. It does in fact exist, but HERE on WordPress, instead.

Friday, December 28, 2007

Free Pattern: Mutant Bunny Hat

So I was wearing a jester hat that I made out of some handspun a few years ago, and my sister commented that it looked like a bunny hat. "A bunny with three ears?" "A mutant bunny, then." "Do you want a mutant bunny hat?" "Yeah!" "Well that's good, I didn't know what to get you for Chanukkah."


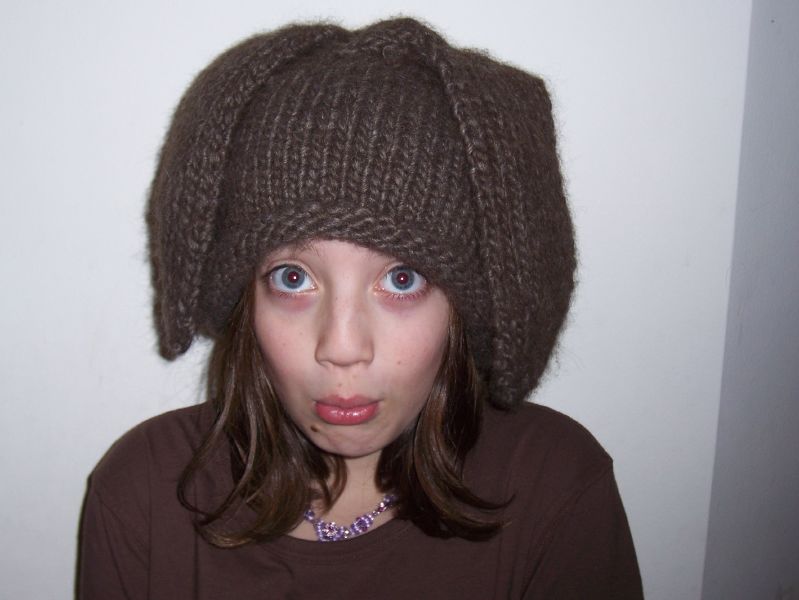
And so the idea was born. And I designed this hat. The beginning is pretty basic, but the ears get trickier. In fact, I doubt I could really explain it properly, so I've included some YouTube videos of how I did various things.

NOTE: As always, please don't hesitate to suggest improvements for content or clarity of the pattern!

Gauge: 3 stitches per inch resulted in a nice stretchy hat that fits my little sister (Kids Large or Women's Small) but also fits me (probably Women's Large).

Materials:
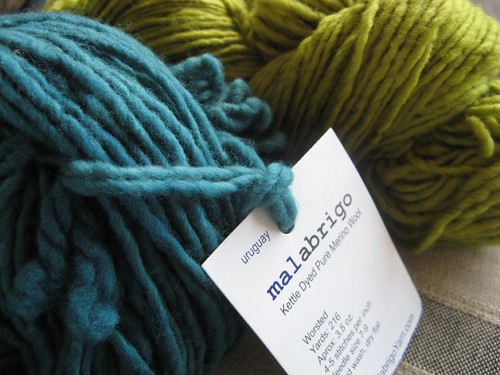
  • Bulky yarn, roughly 200 yards (I'm being generous here, I think it's less than that), about 150 of the main color and 50 yards of a contrast color for the ears. I used 3 balls of Reynolds Blizzard and one skein of Malabrigo worsted held double. It came out very nice.
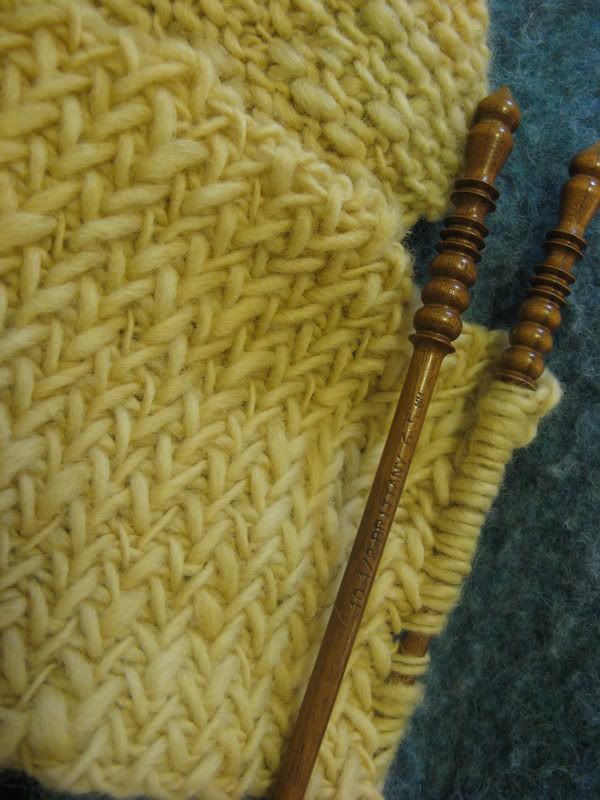
  • Circular and double pointed needles in an appropriate size - US9 worked for me.
  • basic supplies such as scissors, darning needle, measuring tape, etc.

Main Hat:
Cast 54 stitches onto the circular needle and knit
in the round with main yarn for 6" (uncurled) or desired length before starting ears.
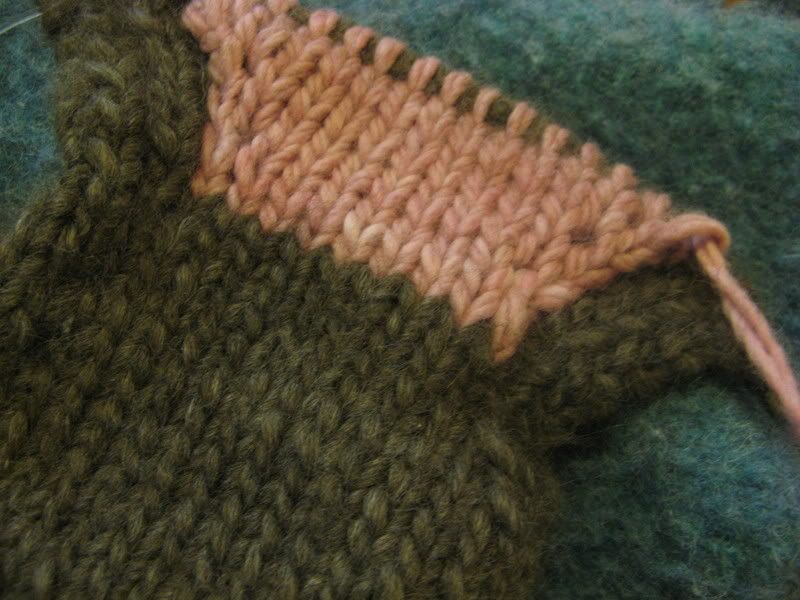
Divide stitches into three sets of 18, putting two sets on scrap yarn and leaving one on the needles. Knit across these 18, then cast on 36 more with e-wrap cast-on, place marker, join, and knit evenly for 3 rounds.

Ears:
The ears are created with a double knitting technique so that the main part has stockinette on either side, one side in main color, and one in contrast color. The outer edges are 1x1 ribbing in main color. When moving from ribbing to doublesided section, the yarns are twisted together to keep the two fabrics from 'peeling' apart.

Round 1: k2, k2tog around (27 st)
Rnd 2: k around
Rnd 3: k1, k2tog (18 st)

Divide stitches onto 2 double pointed needles (9 on each). With a third needle, knit one stitch off of front dpn, then purl one off of the back one. Do this once more. You will now introduce the contrast yarn. Bring main yarn to the back, twist together (bringing the yarn you were working with over the one about to be introduced - this twisting only needs to be done when moving from ribbed section to double knit section) then ssk off the front needle with
contrast yarn. *Bring both yarns to front, p1 off the back needle with the main yarn, bring both yarns to back. K1 off front needle with contrast yarn.* Repeat between *'s twice more. Bring both yarns to front and p2tog off of back needle with main yarn. *k1, p1* twice with main, knitting off front needle and purling off the back needle.

This general technique is utilized until the top tip of the ear - knitting off front and purling off back while moving yarns back and forth, but with all stitches on one needle instead of divided onto two. Please watch the videos for clarification.
Regular row, contrast side:

Regular row, main color side:


Work two more regular rows, followed by an increase row, which is worked in the same manner, but after the first 6 stitches (4 of ribbing, 2 of main ear, 1 in each color), increase by one stitch in each color by knitting into the loop below. Also do this when there are 6 stitches left (at the other end of the row). See video below.


Work two regular rows, then another increase row (it will be on the other side, but worked in the same way).

Work 20 more regular rows.

Work a decrease row as follows: Start with ribbing as per normal. You'll have to shuffle some stitches around, but it can be done with an agile-enough finger. SSK the first two contrast stitches, then p2tog the first two main color stitches. Work across until 8 stitches remain on needle (4 ribbed and 2 of each color in the doublesided part). K2tog the contrast stitches and p2tog the main color stitches
from left to right through the back loop. See video.


Continue decrease rows every third row until 12 stitches total remain on needle. Work one more row after the final decrease row(not two rows as usual). You should be on the contrast color side. The last decrease row is slightly different. Move the stitches around so that the first three ribbing stitches are followed by the two remaining contrast color stitches.

K1, p1. Bring both yarns to the back. Slip the next stitch as to purl, k2tog with contrast color, then pass slipped stitch over the stitch you've just created. Bring yarns to back. Slip next stitch as to purl, p2tog with main color, then pass slipped stitch over. Finish the row normally. All the stitches on the needle should now be of the main color. Divide them onto two dpns, knits on the front one and purls on the back one. Now you'll finish the ear working in a stockinette circle again, decreasing until 2 stitches remain.


Final decreases:


Rnds 1, 2: knit all the way around (8 sts)
Rnd 3: *ssk, k2tog* twice (4 sts)
Rnd 4: ssk twice

Break yarn and draw through the two remaining stitches. That's an ear!

Ear 2:
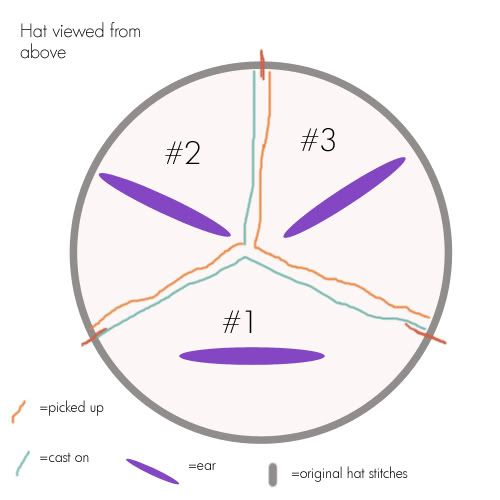
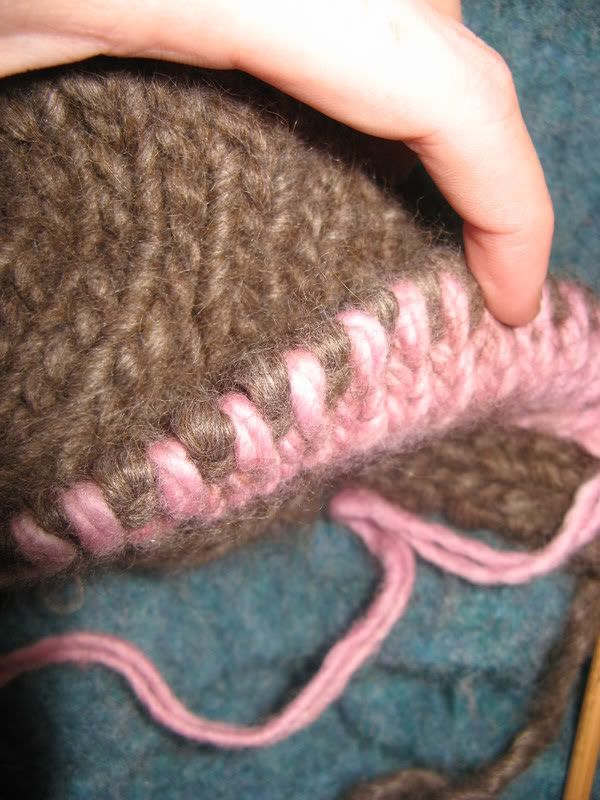
Put next set of stitches (clockwise from first completed ear) onto needles. Cast on 9 stitches, then pick up 9 from the half of the bottom edge of the first ear which is closest to the stitches that were on the holder (you may need to read that twice!).

Knit 3 rounds normally, then k27 and place marker. This is the new beginning of the row. Start from the beginning of the ear instructions and work the second ear the same way. It will be identical to the first ear except rotated to face partially the same way.

Ear 3:
Same as Ear 2, but you will not have to cast on any as all stitches will be available to pick up. The round should begin halfway (9 st) across the 18 that were on the third holder.

Here's a diagram to clarify how the ears 'fit together.'


Finish, and enjoy!

Here's an idea: If you're boring interested in creating a more conventional bunny hat, I suggest omitting the first ear and instead of working the ear on those 18 stitches, continuing to decrease as if you were finishing a smaller hat, then drawing the yarn through at the end. Work the second two ears as directed, and there you have it! A normal bunny hat!

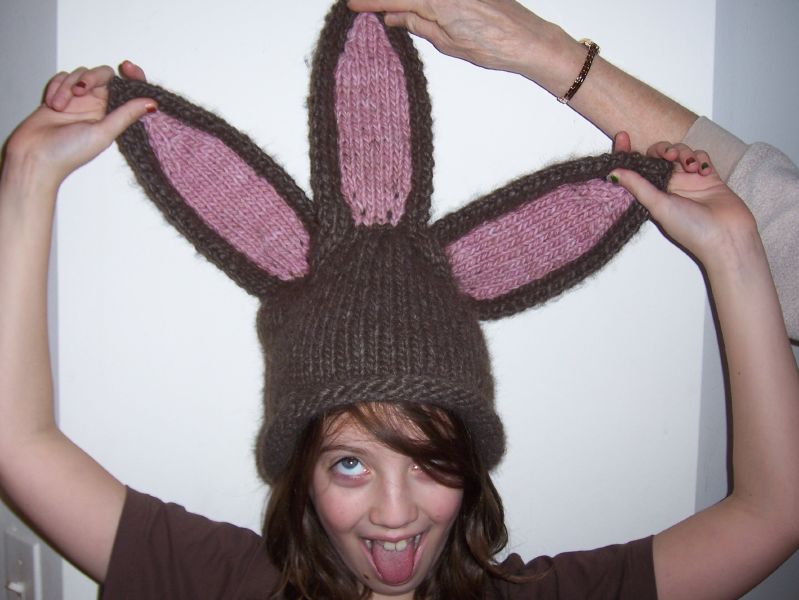
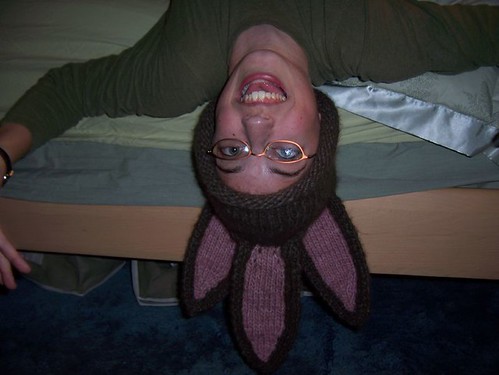
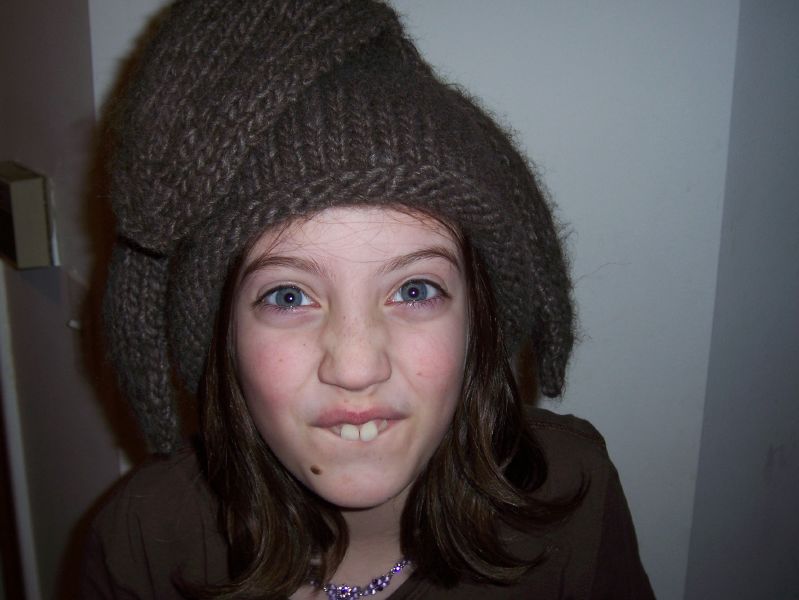
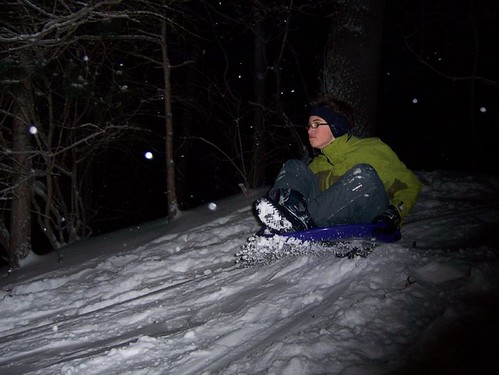
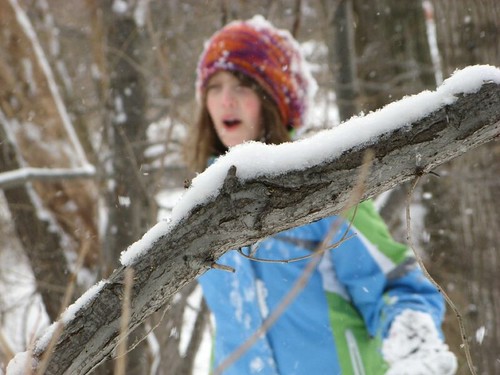
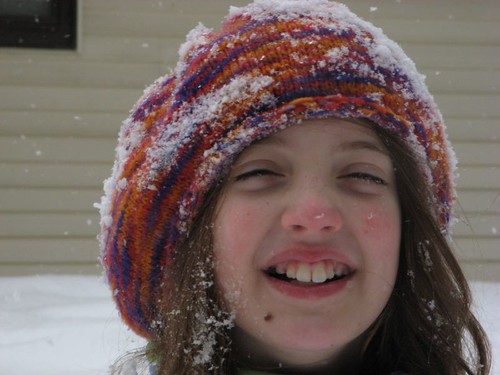
Some more pictures for your enjoyment:


Credits:
Addie (my sister): model, recipient, idea-inspirer, cinematographer
Nancy (my mom): Editor, cinematographer (sort of)

Wednesday, December 26, 2007

Gifts and Such

So I dropped off Alethia's gloves the other day, and she gave me malabrigo! It wasn't a total surprise, since I had told her I wanted some, but it was certainly welcome.

*drools*

Our nanny, Renee (REE-nee (short for Lorene), not ri-NAY :P ), has worked for my parents since I was 6 months old, so at this point, she's more of an adopted grandmother. Every year since I remember, we've slept over at her house sometime before Christmas and trimmed her tree. (Yes, even though we're Jewish.) We went this past Sunday, and, Renee being Renee, she gave us gifts. I got to pick out a watch I wanted (mine's falling apart), so this one's on its way:

She also gave me some very cozy socks and a pair of pants.

Apologies for the horrible photo, my camera was dying.

Then, we went skiing on Christmas. Both my siblings forgot sweatshirts (how do you forget a sweatshirt when skiing?!), so we made a pitstop in the shop and my mom got them each one. While they were picking them out, I was trying on a very cozy one just for fun, but then she bought it for me! She said I shouldn't be penalized for remembering my sweatshirt, but I think she just liked it and wants to steal it sometimes.

It's very cozy. Quite.

On that same trip, I fell rather hard on my snowboard onto a locked wrist. OUCH. It still hurts today and my mom says I could've broken one of the teensy bones in my wrist, even though I can still move it and it only hurts a little when I'm not moving it, so I might get it X-rayed in a few days if it doesn't stop hurting. At swim practice today, when I tried to explain to the assistant coach about it to imply that I might not be at 100% during practice, she was really obnoxious. She said, "I have no pity for you. You were doing another sport during swim season." Come ON! If she thinks I'll give up skiing/boarding for swimming, she's got another think coming. And she and the head coach will probably both flip out, but if ski club conflicts with any swim meets, ski club comes first. I mean, a) skiing's WAY more fun, and b) My parents already paid for it! Thanks to reason (b), my parents are on my side and will support me if coach gets really pissy. But gragh. I almost hope something is broken just so I can wave it in the assistant coach's face!

And, after ripping out ears entirely too many times, the mutant 3-eared bunny hat is finally almost done! I'm definitely writing a pattern, but I'm pretty bad at explaining stuff, so I think I'll include some videos of how the heck I'm doing it...

Ta ta for now!

Friday, December 21, 2007

Many things

I'll start with the icky news, then if you read it, you get a reward with happy stuff.

To explain the icky news, I need to impart some good news, though. We finally went skiing today! Sort of. For the morning, I snowboarded, which I think I did a total of once last season, so I was pretty rusty. By lunchtime, I was finally getting the hang of turning again. Sorry, no pictures - you think I trust myself not to fall on a camera?! But on the lift up for our last run before lunch, I was fixing my helmet and had taken off my glasses. As I put them back on, one of the lenses popped out and fell down to the ground. We (my mom and I) spent about 15 minutes searching for it - I do have Transitions lenses, so it was dark-colored. But we didn't find it. I wasn't really comfortable snowboarding without good vision, but I'm a pretty competent skier, so I figured I would just ski for the afternoon - I had brought my skis as well.
However, when I went to put my skis on, it turned out that the people at the shop had adjusted the bindings entirely incorrectly. They were literally about 3 inches too far apart! And the irritating thing was, I didn't even get new boots, so they shouldn't have done anything at all to the bindings! I just left my skis for a tuneup.
Annoyed but not to be defeated after working so hard to convince Mother Dearest to take us, I put on my skiboards and had fun for the rest of the day. On the way home (1.2 hours or so), I could fortunately work on My So Called Scarf, which I don't need to see too well for.
When I got home, I put on my old pair of glasses. Good news: I can see! Bad news: Old prescription now makes me dizzzzzy. Not so fun.

Anyway, done with my rant. On to cool stuff! With pictures! Which you're not allowed to comment upon if you don't prove that you read the above woes and misery. :P

My So Called Scarf goes.


As does the bunny hat! I really like how this is coming out, so I think I'll write up the pattern. By the way, mine's out of Blizzard and pink malabrigo (held double to match the gauge of the Blizzard). Here's an incipient ear (one out of three...). It's double-sided, so the back of this is the brownyblackgrey color, as you can kinda see in the next picture.


It's a very soft hat, and I've told my sister that she must wear it every day. She looked a little worried...

Monday, December 17, 2007

Fun in the SNOW!

We're right in the middle of the blizzard that's still blowing through! So Alethia came over and we sledded yesterday night and this morning. I have a veritable potpourri of pictures thereof, to be followed by some knitting-related schpiel...


Here we see my beloved brother trying to fit into a toddler sled and going over the skateboard jump we set up on the hill next door. This, as you can probably tell, was last night.


And here I am going over the jump as well, with a very strange look on my face. Now for some from today, with actual light...


And Alethia, seeming to defy the laws of physics...


A surreal, but pretty neat picture of me.
And now come some cool pictures of my sister.


She always asks why I randomly take pictures of her...isn't it obvious? She's so photogenic! And by the way, she's wearing a beret I made a few years ago out of a kit from Morehouse Merino.

My multiple WIPs plod along. I've nearly finished the heel on the socks made out of that green yarn from Chanukkah. My So Called Scarf is more or less on hold. I'm working on Alethia's Almost Fingerless Gloves (a birthday present, which was not done by her birthday...), and then I'll do Addie's (the sister) mutant bunny hat - a Chanukkah present, which wasn't done by Chanukah either. It'll be my first time using malabrigo, and I'm SO excited. I'm pretty much in love with that yarn. It also includes Blizzard, which, even though it contains acrylic, I really like. I promise some pictures of all this knitty goodness...at some point. Ta ta for now!

Saturday, December 8, 2007

Life, Loot, Love

Life goes fairly well. Our school gets 2+ weeks of holiday break, which means 4.5 more days! Half day this coming Friday, then FREEDOM! Boy, am I ready. Except there'll still be 2.5 hours of swim practice almost every day through break. Except now there's a purpose. Our past two meets, the girls team won 48-46, and BOY was it intense. They both came down to the last relay, in which I anchored the B-team. The first one, the whole meet came down to the B-team relay, which basically meant down to me. No stress, right? I was so scared of screwing it up for everyone, I beat my time trial time for 100yd freestyle by 10 seconds and nearly puked afterwards. Which was good, I guess. The time, not the puking.


Anyway, getting some sweet loot for Chanukkah, including:
-$25 iTunes card, with which I bought Flood by They Might be Giants, Surprise by Paul Simon, and a few other songs.
-A knit commission from my mom - I said I wanted a new pair of mittens from Anna Zilboorg's Magnificent Mittens, with angora linings. She made me a pair of these several years ago, but I outgrew them.
-A Ripstik (above)- which is like a skateboard, but more dangerous if you don't know what you're doing. I've been ogling them for a few years now:
Nifty, no?
-An amazing bag that my mom and grandma collaborated on to make for me. My mom picked out the fabric and cut it, and my grandma did most of the sewing. It also included a new set of doodads (complete with Altoids tin to hold them) and some sock yarn! See more pictures below.


Friday, December 7, 2007

Almost Fingerless Gloves - Free Pattern

Note: I corrected the cable pattern - it's 6 rows long, not 8.

So, here it is, guys! My first 'real' pattern, as it were. I'm pretty proud of it. However, please don't hesitate to suggest improvements, especially for clarity. I have trouble explaining things, sometimes, and it'd be great to hear if other people understand this...I would actually like people to knit these, after all. ;) I've also tried to make it clear where customization of the pattern is very easy - I hate for people to feel constrained by instructions.


Note: I recommend reading through the whole pattern before knitting it to ensure understanding, both of techniques, construction, etc. and of the different options given for different parts.

Techniques:
cast on, knit, purl, use double pointed needles (dpns), cabling (c3b = bring 3 stitches to back on cable needle (cn), knit 3, knit 3 off of cn), pick up stitches, increase (knitting into loop below), bind off

Materials:
  • yarn - I used Cherry Tree Hill sock yarn, but Koigu or anything of similar weight would work. Yardage depends on desired wrist length - I used one skein of the Cherry Tree Hill (420 yards, I believe) and had plenty left over. Note: In this weight yarn, the pattern will produce what would probably be a woman's small, or maybe medium - it's fairly stretchy due to the cables and ribbing. To make a larger size, either adjust the stitch count or use thicker yarn.
  • dpns of appropriate size (to get a gauge that doesn't leave noticeable holes but isn't too stiff, either). US 2 worked well for me.
  • cable needle (or just a spare dpn, perhaps of one size down)
  • 2 stitch markers
  • scrap yarn to hold stitches
  • basic supplies (scissors, darning needle, etc.)

Pattern:
Wrist:

Cast on 57 stitches, dividing as follows:
on 3 needles - 15, 21, 21
on 4 needles - 15, 21, 10, 11
They should be divided this way to maintain integrity of pattern (cables, etc.). It also makes it easier to try it on while making it, because all the palm stitches are on one or two needles, and all the stitches for the back of the hand are on two needles.

Rnd 1-6: (p2, k6, p2, k3) 3 times, (p3, k3) 3 times
Rnd 7: (p2, c3b, p2, k3) 3 times, (p3, k3) 3 times

Continue in this manner for desired wrist length (roughly 50 rows to do it like in the photos).

Hand:
Stitch pattern remains the same, except: Replace the 21st of 3x3 ribbing at the end of the round with k21. While doing this:

Thumb, method 1 - Gusset:
Thumb is made in between two stitch markers, with the rest of each round continued in the established pattern. For the right glove, place the markers on either side of the first two stitches of the 'k21' at the end of the round. For the left, place on either side of the last two stitches. These rounds are what to do in-between the markers. They may or may not correspond with the rows of the cable pattern.

Rnd 1: k1, inrease by knitting the loop below, k1
Rnd 2, 3: knit
Rnd 4: k1, knit to last st before marker, increase, k1

Repeat rounds 2-4 (while continuing pattern for rest of hand for the rest of each round) until there are 9 stitches between the markers. Continue as established, knitting from marker to marker, until the glove comes up to the place where the thumb separates from the hand. Put the thumb stitches on a piece of scrap yarn, cast on 2 stitches over the gap, and continue with the general pattern, cables on the back and knitting across the palm. At the end, finish the thumb in the same manner as the other fingers.


Thumb, method 2 - Slot:


Begin working back and forth, continuing the cable pattern by replacing knits with purls and purls with knits on the wrong side. Be sure to turn and purl after an even-numbered row so that you won't have to cable from the purl side.

Once the glove comes up past the point where the thumb separates from the hand, reattach and work in the round again.


When the glove goes to slightly below the highest point of the palm, place all the stitches on a piece of scrap yarn.

Fingerlets, as it were (ending 1):
For each finger, take 4 stitches from the palm and 9 from the back of the hand. For the middle finger, take 5 from the palm. Work the pinky finger first, taking the 13 aforementioned and casting on two more across (between pinky and ring finger). Knit these for approximately 3 rows (again, a judgment call), then bind off. For the ring finger, pick up two from the pinky (where they were cast on) and cast on two between the ring and middle finger, then knit these. Continue this procedure across top of hand, and for thumb if you used method 1.

Ending 2 - ribbing:
I haven't tried this, so I don't have a picture, but I think it could also look nice, if you just can't deal with all those fingers and ends, to simply finish with changing back to 3x3 ribbing for the palm at the end of the glove instead of making the fingerlets. It would also go reasonably faster.

Here's a cool idea: On the second glove, make the cables twist the other direction. That is, cable to the front instead of the back.

Finishing:
Weave in all ends. You may want to use the (multiple!) ends around the fingerlets to close up any little holes that may be left from picking up and casting on stitches, just to neaten it up.

Wear (or gift) and enjoy!